A lot of people don’t know how to skim coat properly, which can lead to a lot of wasted time and money. Skim coating is a useful skill for any homeowner or contractor to have, but it’s not always easy to do correctly.
We’ve put together this guide on how to skim coat a brick wall properly so that you can get the job done right the first time. With our tips and tricks, you’ll be able to finish the job quickly and easily.
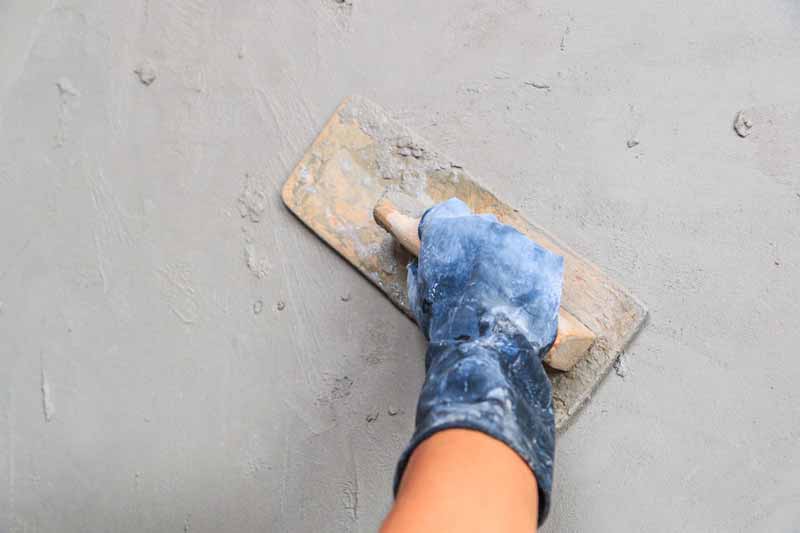
To skim coat brick wall properly, use a trowel to spread the mortar over the surface. Make sure to fill any holes or cracks in the brick before you start. Once the mortar is dry, use a sandpaper or wire brush to smooth out the surface.
The above is just an overview and later in this article we will go into more detail on each step.
Step by step guide to skim coat brick wall
We have put together an easy to follow step by step guide to get the best result when skim coating a brick wall:
- Start by preparing the surface of the brick wall. This involves cleaning the wall to remove any dirt or debris.
- Once the surface is clean, apply a bonding agent to help the skim coat adhere to the brick. The bonding agent can be a product like Bostik Gripfill or similar.
- Now you are ready to start applying the skim coat. We recommend using a 12” trowel for this job. Start in one corner of the wall and work your way across, overlapping each stroke as you go.
- After the first layer of skim coat has been applied, allow it to dry completely before adding a second layer.
- Once the second layer is dry, you can sand it down to create a smooth finish.
- Finally, apply a sealer to protect the surface of the skim coat.
With these simple steps, you will be able to successfully skim coat your brick wall and achieve a smooth finish. If you have any questions or need any assistance, don’t hesitate to get professional assistance.
What skim coating is and what it’s used for
Skim coating is a thin layer of material that is applied to a surface. The purpose of skim coating is to fill in any imperfections on the surface and to give it a smooth finish.
Skim coating can be done with plaster, drywall compound, or paint. It is usually applied with a roller or a brush.
Skim coating is often used when refinishing walls or ceilings. It can also be used on concrete floors, wood floors, and metal surfaces.
When used on walls, it can cover up minor dents and scratches, as well as seams and joints where two pieces of drywall meet.
When used on ceilings, it can hide any flaws in the surface, such as bumps or ridges.
Skim coating can also be used to create a smooth finish for painting or staining.
Skim coating is a quick and easy way to improve the look of your home or office. It can cover up imperfections and give any surface a smooth, professional finish.
Whether you’re refinishing walls, ceilings, or floors, skim coating is a great way to achieve the results you want.
Is skim coating good for brick wall?
Skim coating is a very thin layer of plaster or drywall mud that is applied over an existing surface. It is often used to cover up minor damage or to give a wall a smoother finish.
While skim coating can be used on brick walls, it is not the best option because it does not add any strength or durability to the surface.
A better option would be to repair any damage and then apply a coat of sealant or paint to protect the brick from moisture and weathering.
Some people like the look of a skim coated brick wall, but it is not the most durable option.
Here are a few pros and cons of skim coating brick wall.
Skim coating brick wall
Pros:
- Can cover up minor damage.
- Gives a wall a smoother finish.
- Can be used to change the color of the brick wall.
Cons:
- Does not add any strength or durability to the surface.
- Not the most durable option.
- Can be difficult to apply evenly.
As you can see, there are some pros and cons to skim coating a brick wall. It is not the best option for everyone, but it can be a good choice if you want to cover up minor damage or change the color of your brick wall.
The supplies you’ll need for skim coating
In order to skim coat, you’ll need the following supplies: a bucket or pan for the drywall mud, a putty knife or taping knife, a sanding sponge, and a sandpaper block.
Let’s take a look at what the uses are for each of these supplies:
- Bucket or pan: This is for mixing the drywall mud.
- Putty knife or taping knife: You’ll use this to apply the mud to the wall.
- Sanding sponge: This is for sanding down the dried mud.
- Sandpaper block: This is for sanding the corners and edges of the wall.
Before you begin you should always test your mix on a piece of cardboard or scrap wood to make sure it is the right consistency. Once you have your supplies, you’re ready to begin skim coating.
How to prepare the surface for skim coating
To prepare the surface for skim coating, you will need to remove all of the old paint and/or wallpaper, and then fill any holes or dents in the surface with a putty knife. Once the surface is smooth, you can begin to apply the skim coat.
Preparing a brick wall for skim coating is similar to preparing any other type of wall. First, remove any old paint or wallpaper and then fill in any holes or cracks with mortar. Once the surface is smooth, you can begin to apply the skim coat.
When skim coating a ceiling, it is important to use a thick-napped roller in order to avoid leaving roller marks.
To avoid lap marks, roll the entire ceiling in one direction and then go back and roll in the opposite direction. Once the entire ceiling is coated, you can then go back and touch up any areas that may have been missed.
Skim coating is a process by which a thin layer of material is applied to a surface in order to create an even, smooth finish.
Skim coating is often used on walls and ceilings in order to prepare them for painting or wallpapering.
Skim coating can also be used to repair damaged surfaces or to cover up cracks and other imperfections.
How to apply the skim coat mixture
To apply the skim coat, you will need a putty knife or trowel, and a bucket of joint compound.
Start by spreading a thin layer of joint compound over the surface, and then use the putty knife or trowel to smooth it out.
Make sure to fill in any holes or cracks, and to smooth out any bumps or imperfections.
Once the surface is completely covered, let the joint compound dry for about an hour before applying a second coat.
If you need to apply a second coat, repeat the process described above. Once the second coat is dry, you can sand it down to create a smooth, even surface.
Finishing up and drying time
Finishing up a brick wall can be a tedious task. The most important part of the process is making sure that the mortar is even and that there are no gaps in between the bricks.
If there are any gaps, they will need to be filled in with more mortar. Once the mortar has dried, it will need to be sanded down until it is smooth.
Finally, a coat of paint or sealant should be applied to protect the bricks from weathering and fading.
Tips for getting a perfect finish every time
Brick walls provide a unique and timeless look to any home. There are many ways to finish a brick wall, but the most popular and durable method is by skimming it.
Skim coating is the process of applying a thin layer of mortar over the surface of the bricks.
This not only protects them from weathering and erosion, but it also gives them a nice, even finish that can be painted or stained any color you like. Follow these tips to get the perfect finish every time:
- Make sure the surface is clean and free of debris before you start. Use a wire brush to scrub off any loose paint or dirt, then rinse with water.
- Mix your mortar according to package directions. It should be thin enough to pour easily, but not so thin that it will run off the wall before it sets up.
- Apply the mortar in a thin coat using a trowel or putty knife. Be careful not to apply too much pressure or you’ll push the mortar into the cracks between the bricks instead of on top of them.
- Let the mortar dry completely before painting or staining (usually 24 hours).
- If you make a mistake, don’t worry – just let the mortar dry completely and then sand it down until it’s smooth before starting again.
With these tips, you’ll be able to achieve a perfect finish on your skim coated brick wall every time.