When you’re trying to hang a picture or put up a shelf, it’s important to use the right size drill bit for your wall plug. If you don’t have the right size bit, you could damage your walls or even worse, the plug itself.
To find the right size drill bit, measure the diameter of the wall plug. Most plugs are between 4 mm and 10 mm, but it’s always best to measure just to be sure. Mostly you can even find a small number on the wall plug indiacting what size drill bit you need.
If there’s no number, don’t worry- we’ll show you how to measure it yourself in just a moment.
It can be hard to remember what size drill bit goes with what size wall plug, but luckily, there’s an easy way to figure it out.
Are drill bit sizes and wall plug sizes the same?
Yes. Drill bit sizes and wall plug sizes are the same. Now you can simply find the size of your drill bit to use for your wall plug.
The only problem can be if you have some wall plugs that does not have the size written on it. Then you have to measure the wall plug with a calliper.
You do this by measuring the width and the height of the wall plug. The size of the drill bit you need will be either the width or the height, depending on which is larger.
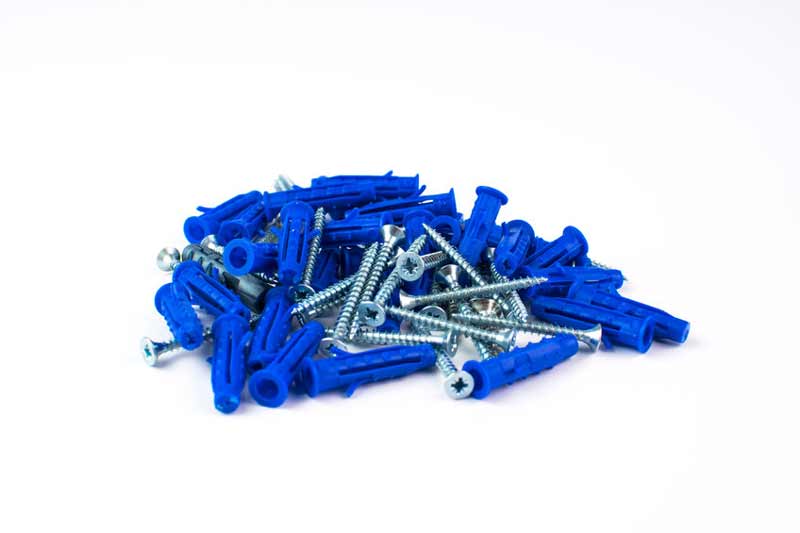
Wall plugs are usually round, so you just need to measure the diameter in order to find the right size drill bit.
How to measure wall plug size manually
There are a variety of drill bit sizes that can be used for wall plugs, and it is important to use the right size bit in order to ensure that the plug is properly secured.
The most common drill bit sizes in millimeters for wall plugs range from 3mm to 10mm.
To determine the proper size drill bit to use for a given wall plug, it is first necessary to measure the diameter of the plug. This can be done by using a ruler or tape measure. Once the diameter of the plug has been determined, consult a drill bit sizing chart to find the corresponding drill bit size.
If you do not have a drill bit sizing chart, you can also use a standard metric or imperial ruler to determine the appropriate drill bit size. For example, if the diameter of the wall plug is 6mm, then a 6mm drill bit would be required. But there are also a number of other sizes that can be used as well. In order to determine the size of drill bit you need, you will first need to measure the width of the hole in the wall.
If you do not have a tape measure handy, you can use a piece of string or wire to approximate the size of the hole. Once you have determined the size of the hole, you can then select a drill bit that is slightly larger than the hole. This will ensure that the wall plug will fit snugly in the hole and will not be able to move around.
It is also important to select a drill bit that is made from a durable material, such as carbide or stainless steel. This will help to ensure that the bit does not wear down quickly and will be able to withstand repeated use.
When using a drill bit for wall plugs, it is important to start off with a slow speed and gradually increase the speed as needed. This will help to prevent the bit from slipping and will also minimize the risk of damaging the wall.
Once you have selected the proper size drill bit and have determined the right speed to use, you can then begin drilling the hole for the wall plug. Start by drilling a pilot hole in the center of the mark that you made on the wall. This pilot hole should be slightly smaller than the size of the drill bit that you are using.
Once the pilot hole has been drilled, you can then increase the speed of the drill and continue drilling until the hole is the same size as the drill bit. Be sure to stop periodically to check the depth of the hole and to make sure that it is not getting too close to breaking through the other side of the wall.
When the hole has been drilled to the proper depth, you can then insert the wall plug into the hole and use a screwdriver or hammer to secure it in place. Be sure to use a level to make sure that the wall plug is flush with the surface of the wall before continuing.
Once the wall plug is in place, you can then begin screwing in the screws that will secure it to the wall. Start by attaching the top screw first and then work your way down to the bottom screw. Be sure to use a power drill for this step so that you can easily drive the screws into the wall without stripping them.
Once all of the screws have been tightened, you can then remove the drill bit from the hole and cover up any exposed wires with wire caps or electrical tape.
Why it’s important to use the correct size drill bit
When drilling a hole for wall plugs it’s important to use the correct size drill bit because:
- If the hole is too big, the wall plug will be loose and could fall out, which could cause damage to the wall.
- If the hole is too small, the wall plug will be difficult to insert and could become stuck, which could also damage the wall.
- Using the wrong size drill bit can also strip the screws, which makes it difficult to secure the wall plug in place.
It’s important to use the correct size drill bit when drilling a hole for a wall plug because it can help to prevent damage to the wall and ensure that the wall plug is properly secured.
How to properly insert a wall plug
When it comes to home improvement projects, one of the most common tasks is drilling holes in walls. Whether you’re hanging a picture or installing a new light fixture, having the right drill bit size is essential to getting the job done quickly and correctly.
In order to properly insert the wall plug into the wall, you’ll need to first make a hole that fits the plug itself. This can be accomplished by using a drill bit that’s the same size in diameter as the plug. For example, if you’re using an 8 mm wall plug, you’ll want to use a 8 mm drill bit.
Once you’ve made the hole, simply insert the wall plug into it and twist it or gently hammer it in until it’s tight.
There are different types of wall plugs. Some are made of plastic and some are made of metal. It’s important to choose the right type of wall plug for the job, as different materials require different types of drill bits and installation methods.
If you’re working with a softer material like plaster or drywall, you’ll want to use a plastic wall plug. These plugs can be inserted without the need for a drill bit, and they’re ideal for light-duty projects. To install, simply push the plug into the hole until it’s flush with the surface. For added support, you can add a small amount of construction adhesive to the back of the plug before inserting it.
For tougher materials like concrete or brick, you’ll need to use a metal wall plug. These plugs require a drill bit and must be installed using a hammer. To install, first drill a hole that’s slightly smaller than the plug. Next, insert the plug into the hole and tap it gently with a hammer until it’s flush with the surface.
Tips for drilling into walls
To round off this article I will leave you with some great tips for drilling into walls. I have used these tips myself with great success.
- Always use a sharp drill bit. A dull bit will not only make the job harder, it can also damage the wall.
- Make sure the drill bit is the right size for the wall plug you are using. If it is too small, the plug will not grip properly and may come loose. If it is too large, you run the risk of damaging the wall.
- Use a spirit level to make sure your drill hole is perfectly vertical. This will ensure that your wall plug goes in straight and will hold more securely.
- When drilling into brick or concrete walls, always use Masonry bits. These are designed to withstand the high temperatures generated when drilling into hard materials.
I hope these tips have been helpful and that you now feel confident about drilling into walls and make use of your wall plugs. Good luck!