Swimming by yourself or with your friends and family helps ease off the mind and body. But then you realize that you’re feeling itchy all over and your eyes are burning. So, you buy a pool testing kit but you’re having difficulties in the process. Well, look no further because this article will show you how to use a pool test kit.
Testing strips, liquid test kits, and digital pool kits are the kits you will find in the market. Testing strips are simple because you just need to dip a strip in the pool and check chemical levels. Liquid test kits take some calculations by mixing some reagents with your sample pool water. And, digital kits opt for accuracy by plunging a test strip into the pool and then inserting it into the reader.
This is just a general overview if you have little time. I will highly recommend you to read the full article where I will elaborately say the nooks and crannies of using these kits. So do stick around if you want to know more!
Types Of Pool Test Kits
There are 3 major types of pool test kits in the market each with their own benefits. Let’s learn about them first before we move on to learning how to use them.
Testing Strips
Testing strips are an immediate way to check your pH, alkaline, and chlorine levels. The new 4-way, 6-way, and 7-way testing strips can also measure total hardness and bromine. You can get these high-quality products from companies like AquaChek, JNW and Poolmaster.
Testing strips are primarily used to monitor your chemical levels to give you a general idea of when your pool starts to change its composition.
Liquid Test Kits
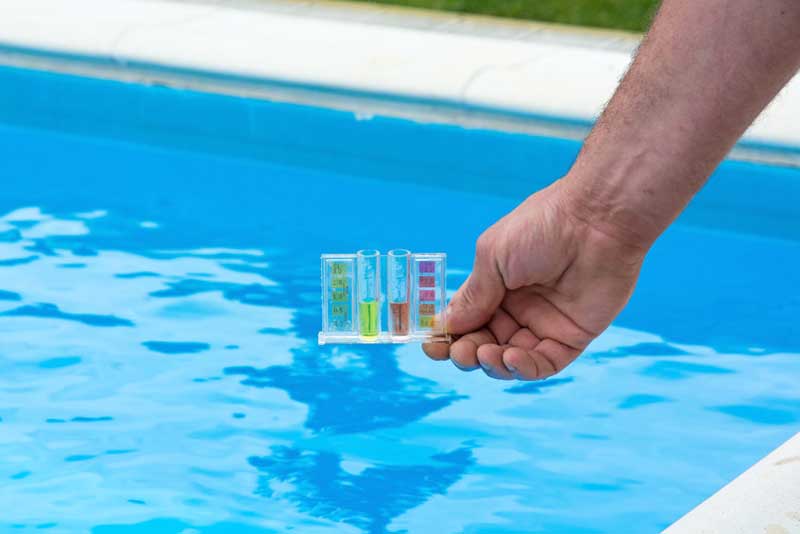
Liquid test kits come with vials and reagents to test your pool’s chemical levels with greater accuracy. They are a bit time consuming but it gets ideal outcomes for chlorine, pH, and alkaline testing.
This kit can also be used for the acid demand test. Through the mixture of some reagents, you can determine how much acid or alkaline component is required. That way you can retain the standard chemical configuration.
Digital Pool Kits
When it comes to speed and accuracy nothing rivals digital pool kits. They are fast, easy to use, and compute quick results. The pool kits contain electrodes and metallic probes to test the pH and alkalinity.
They can be limited in their areas which means for different chemicals different types of pool kits may require. They are expensive compared to the other options but rest assured that it’ll be worth the money.
How To Use Pool Test Kits?
Obviously different types of kits will require different methods of usage. So, here I will be talking about how you can test your pool using each of the methods.
Using Testing Strips
Testing strips are the easiest to use. You can buy testing strips from any nearby pool shops. The strips are bombarded with different types of reagents on their associated small squares. They are tested for different chemical compounds as mentioned before. Here’s how you use them:
Step 1: Dip the strip into the pool at the elbow’s depth and then pull it out instantly.
Step 2: Shake it gently to remove excess water and then check the results. The small squares or dots will change color which corresponds with the chart given on the bottle or at the back of the packaging.
Step 3: The chart’s rows determine different chemicals and the columns show their levels. Compare the colors with the charts and act accordingly.
Using Liquid Test Kits
All private pool owners should have a liquid test kit at their homes. It is imperative to check chemical levels daily to ensure no algae and bacteria have formed. Here I will show you the following steps to use the liquid test kit.
Step 1: Take sample water in the glass vial provided by the kit. Make sure to take the water at 18 inches or elbow depth. Create an air bubble by pushing the vial downward then turn it around. That way you will get a fresh sample without any surface rubbish.
Step 2: Your pool test kit should have a thick and thin vial. The thick one is for pH and the thin one is for chlorine testing. For testing chlorine, add five drops of reagent bottle no.1 or Orthotolidine (OTO) on the thin vial. The color will change to yellow. The deeper the color the higher the chlorine level.
Step 3: For pH add one drop of reagent no.4 or chlorine neutralizer. Chlorine can offset the reading for pH so we have to neutralize it first. Then add five drops of reagent no. 2 or phenol red. You will see that the color has changed to reddish pink. The deeper the color the higher the pH.
Step 4: For testing alkalinity, use the thick vial again and fill it up to the fill line indicated on the vial. Then again add one or two drops of chlorine neutralizer to receive accurate results. Finally, add two or three drops of reagent no. 5 and give it a light swirl. Repeat the process until the water clears up.
Remember to count each drop as it will help you calculate the ppm. Multiply by 10 for each drop.
Example: 10 drops = 10 drops x 10 = 100 ppm (this is an ideal range for alkalinity)
Step 5: In the acid demand test add one drop of reagent no. 3 on the pH vial and gently mix. The color will change after every or a few drops. Remember how many drops you add until it changes to the ideal color range provided above.
Once it reaches the standard range, check the acid demand table given by the test kit. Determine how many gallons your pool is. Then see how many milliliters of muriatic acid you need based on the number of drops you add.
Hence, by following these steps you can easily test your pool chemical levels using a liquid pool testing kit.
Note: The vial numbers and colors may be different depending on the product you are using. Make sure to follow the instructions provided by the kit. This is a general step-by-step example.
Using Digital Pool Test Kits
Digital Pool Kits are simple to use. Just dip a testing strip like you normally do. Then remove the strip and insert it in the reader of the digital kit. All the required pH, chlorine, total hardness, bromine and alkalinity stages will appear on the display.
Make sure to have different types of digital kits for different chemicals and check the charts for ideal chemical levels. In this way, you can use digital pool kits to get the required results.
Ideal Chemical Levels In A Pool
There is no point in testing your pool if you don’t know what to look for. There is a certain criterion of chemical levels that you need to maintain. Here’s what you should be checking and maintaining in your pool.
- pH: 7.2 – 7.8
- Chlorine: 1.0 – 3.0 ppm (parts-per-million)
- Total alkalinity: 80 – 120 ppm
- Calcium hardness: 180 – 220 ppm
- Total dissolved solids (TDS): Under 5000 ppm preferable
- Cyanuric acid: 50 – 80 ppm
- Bromine: 3.0 – 6.0
These measurements may vary slightly from kit to kit but these are the general levels you should look out for. The pH, chlorine, and total alkalinity are to be tested frequently (3 or 4 times a week). The rest do not change much with time so once a month is fine. Also, ppm can be termed as mg/L (milligrams per Liter).
If you read this far then I hope you found your solution. Remember that testing strips are great for monitoring your pool integrity. Liquid testing is more accurate and detailed, and digital is fast, expensive, and calculative. It is recommended to at least have the liquid kit and testing strips. Hopefully, this article is concise enough to teach you how to use a pool test kit.